Heading off to the Boat Show
24/12/09 08:06
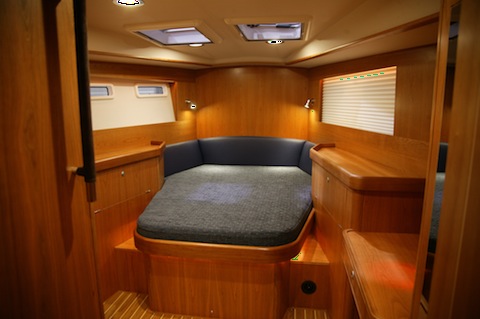
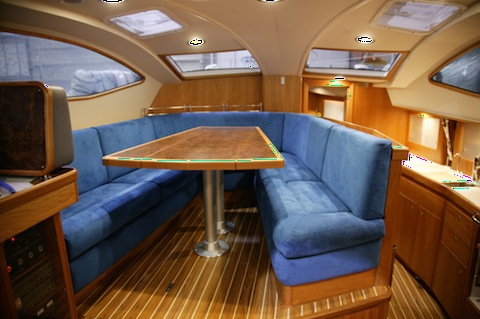
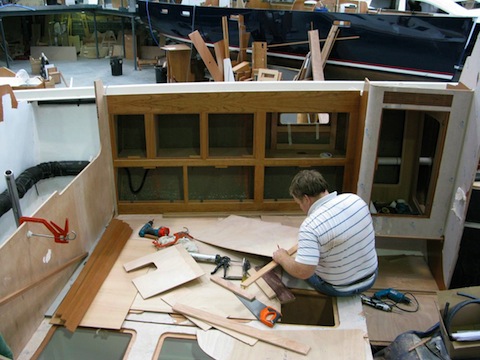
There are also a few shots showing the inside finished. We chose Cherry wood for the interior again (same as on the 42). This is the forward master stateroom (looking forward). The black circle under the bunk is a heating vent! For the first time in 20 years of voyaging we are planning a trip north! Details to follow!
If you are around England early January why not come to the London Boat Show! And if you do please drop by Northshore’s booth (stand) and say hello!!
Comments
Almost ready for the Boat Show
12/12/09 08:22
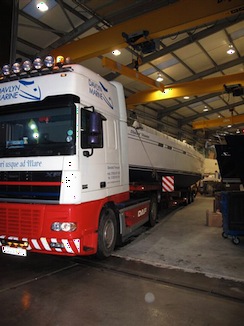
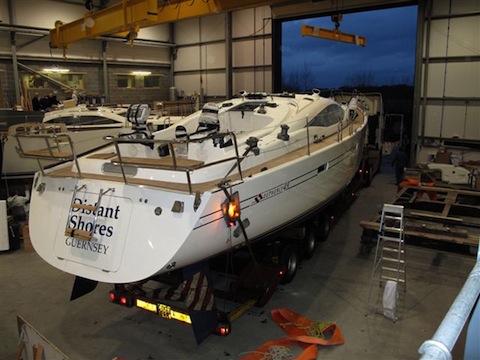
Its just a couple of weeks until the London Boat Show. Northshore is taking our new boat to the show so it must be ready on time!
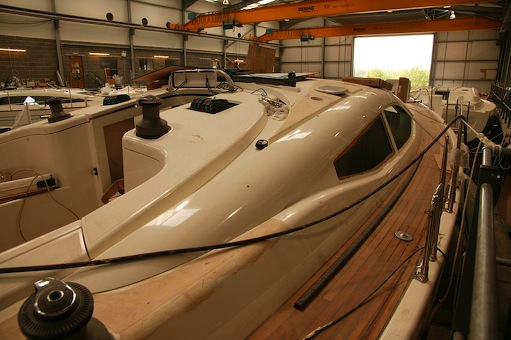
Here she is in the factory as final touches are applied on deck. Note how low the boat sits in the factory since here keel is fully retracted.
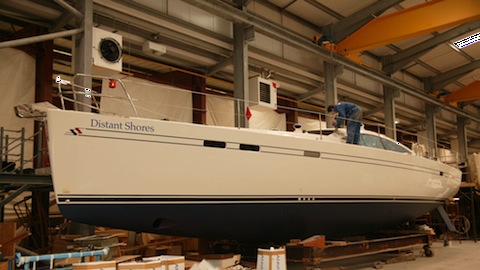
The London Boat Show starts on January 8, but it turns out the boats must arrive well before that for the set up in the buildings. So she will be moving from Northshore around December 20! I was quite surprised it is such a long set up time. The London Boat Show is the only boat show I have been to outside North America, and its AMAZING! We were there three years ago and I have to recommend it if you can get there. Certainly if you are serious about getting a new cruising boat, it pays to check out the European offerings, and many more of them come to London than the American shows. Plus its just plain fun to go to a different boat show!
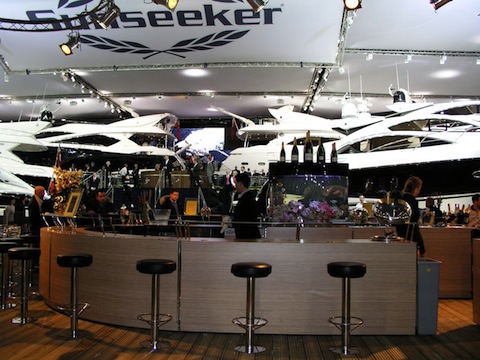
 We found London was amazing in how much work was put into the displays, or “Stands” as the British call them. We are used to some carpet being put down around the boats, with ramps and stairs to help you get on board. But in London the Stand can be much more ornate.
Northshore had a nice little Cappuccino/Cafe and owners lounge, and they were one of the more restrained. The larger powerboat manufacturers build entire restaurants, oyster bars with linen and waiters standing by! (I shot this in 2007)
This year Sheryl and I are very excited to be presenting on the main show stage at the London Boat Show! We will be talking about our latest transatlantic crossing in 2007, and give some hints for enjoying the amazing shallow Bahamas.
Times:
If you are around please drop by!
Of course we will also be hanging around our new boat at Northshore’s stand. We will be at the show Friday Jan 8 through Monday Jan 11 then flying back for Toronto.
Here she is in the factory as final touches are applied on deck. Note how low the boat sits in the factory since here keel is fully retracted.
The London Boat Show starts on January 8, but it turns out the boats must arrive well before that for the set up in the buildings. So she will be moving from Northshore around December 20! I was quite surprised it is such a long set up time. The London Boat Show is the only boat show I have been to outside North America, and its AMAZING! We were there three years ago and I have to recommend it if you can get there. Certainly if you are serious about getting a new cruising boat, it pays to check out the European offerings, and many more of them come to London than the American shows. Plus its just plain fun to go to a different boat show!
Northshore had a nice little Cappuccino/Cafe and owners lounge, and they were one of the more restrained. The larger powerboat manufacturers build entire restaurants, oyster bars with linen and waiters standing by! (I shot this in 2007)
This year Sheryl and I are very excited to be presenting on the main show stage at the London Boat Show! We will be talking about our latest transatlantic crossing in 2007, and give some hints for enjoying the amazing shallow Bahamas.
Times:
- Saturday 9 January, 10:30-11:00
- Sunday 10 January, 12:00-12:30
If you are around please drop by!
Of course we will also be hanging around our new boat at Northshore’s stand. We will be at the show Friday Jan 8 through Monday Jan 11 then flying back for Toronto.
Power Systems photos
02/12/09 06:43 Filed in: Electrical
I have mentioned before that the new Southerly 49 has a distributed power system. I took a few photos of this the last time I was over but they didn’t come out, so I asked Southerly Engineer Ian to send me a couple of shots. Ian is has been doing the electrical and machinery installations on our new boat and as you can see from the photos he does meticulous work! Thanks for the pix Ian!
Here is a close up of one of the EmpirBus nodes. This one is in the Aft cabin so any wiring in the aft of the boat will come here instead of running all the way up to a main circuit panel. Note the sound insulation. This is a compartment just aft of the engine box and although it wouldn’t strictly need to be insulated, they have done it just to make extra sure the boat is quiet!
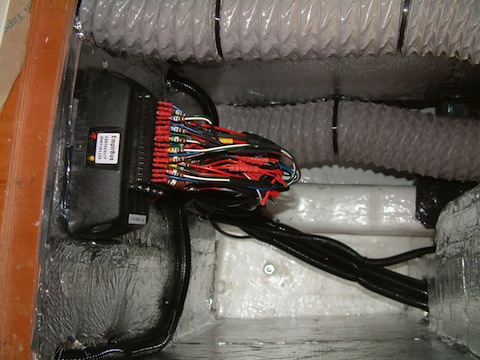
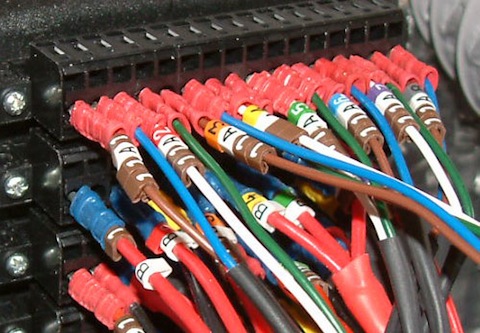
Now here is a close up of the wiring to the node. Main power to the node comes in the lower left with the big red wire. (negative is hidden in this photo). The individual circuits and control wires are all neatly labelled.
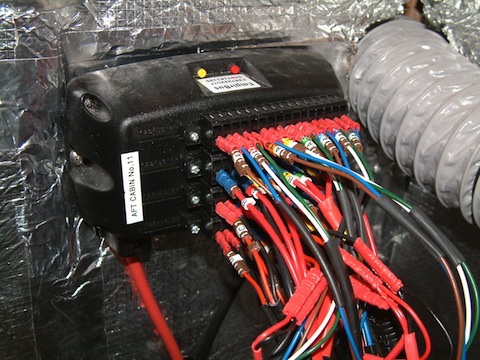
Here you can see the wires are all coded. Both ends of the wire are named and the codes are recorded in the wiring diagram for the boat. Note Upper left wire is “11A1” meaning Node 11, Block A, terminal “1”.
With a distributed power system the functions of each node are programmed by software. So you do need to know exactly which you have plugged into. Then you tell the system what you would like that terminal to do!
Example: Deck Flood light. On a traditional boat this would have a switch at the main wiring panel. But now we can do more than that. First the deck light is connected into a node to give it power. Then assign a switch that can control it, perhaps at the main panel. But we could also program one of the switches at the helm to turn it on. And say we wanted a kind of “Alert” switch in the forward cabin in case we had an emergency. Simply program one of the switches in the forward cabin to do a few things. It could turn on the saloon lights plus the deck flood and cockpit lights all at once. This could just as easily be done at any time. There would be NO additional wiring to do this at all.
There will be some more learning to get familiar with the new power system but the benefits will be well worth it.
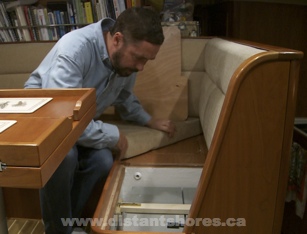
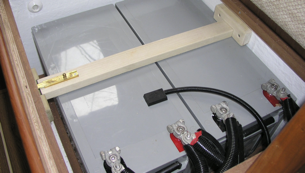
Battery Bank
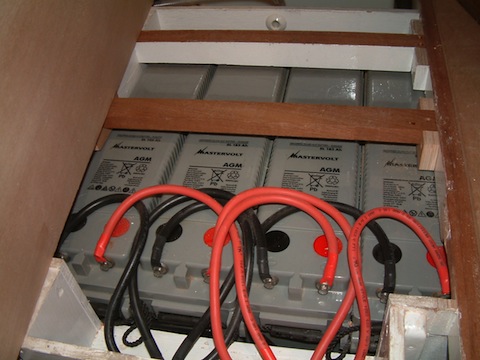
Ian also sent some pictures of the main battery bank installed. We have four large 185AH Mastervolt AGM batteries totalling 740AH capacity. Another neat installation and with the boat’s raised saloon they are able to install them centrally and keep the weight over the keel.
Here is a close up of one of the EmpirBus nodes. This one is in the Aft cabin so any wiring in the aft of the boat will come here instead of running all the way up to a main circuit panel. Note the sound insulation. This is a compartment just aft of the engine box and although it wouldn’t strictly need to be insulated, they have done it just to make extra sure the boat is quiet!
Now here is a close up of the wiring to the node. Main power to the node comes in the lower left with the big red wire. (negative is hidden in this photo). The individual circuits and control wires are all neatly labelled.
Here you can see the wires are all coded. Both ends of the wire are named and the codes are recorded in the wiring diagram for the boat. Note Upper left wire is “11A1” meaning Node 11, Block A, terminal “1”.
With a distributed power system the functions of each node are programmed by software. So you do need to know exactly which you have plugged into. Then you tell the system what you would like that terminal to do!
Example: Deck Flood light. On a traditional boat this would have a switch at the main wiring panel. But now we can do more than that. First the deck light is connected into a node to give it power. Then assign a switch that can control it, perhaps at the main panel. But we could also program one of the switches at the helm to turn it on. And say we wanted a kind of “Alert” switch in the forward cabin in case we had an emergency. Simply program one of the switches in the forward cabin to do a few things. It could turn on the saloon lights plus the deck flood and cockpit lights all at once. This could just as easily be done at any time. There would be NO additional wiring to do this at all.
There will be some more learning to get familiar with the new power system but the benefits will be well worth it.
Battery Bank
Ian also sent some pictures of the main battery bank installed. We have four large 185AH Mastervolt AGM batteries totalling 740AH capacity. Another neat installation and with the boat’s raised saloon they are able to install them centrally and keep the weight over the keel.
Factory Visit - Power Systems
09/11/09 14:57 Filed in: Electrical
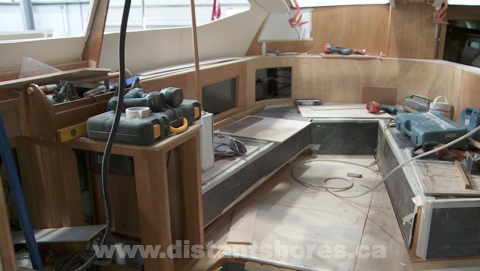
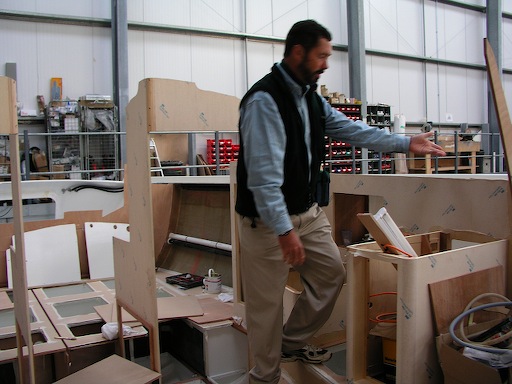
I just got back from a very quick visit to England to see the new boat. Exciting!!! Its just over a month now until the boat will be moved to the Excel Centre in London in preparation for the London Boat Show. Here’s a picture of the inside - still lots to do!
One of the most interesting engineering features of this model of Southerly is that she uses the leading edge “distributed power systems”. This means instead of a big main breaker panel there will be nodes throughout the boat that control the electrical system closer to the item being controlled.
Distributed power has two main advantages. 1) It allows much more control and monitoring of the use of electrical power. And 2) It reduces wiring by and the massive bundles that used to make their way aft to the panel.
1) Any circuit can be controlled from any switch in the boat. For example, the deck light can be turned on from a lighting panel but also from a second switch that also turns on the cockpit lighting. Or anywhere else you wanted. Each switch is programmed with what it will do. And you can change that later - no rewiring, just connect your laptop and tell the switch to do something else. Or add a switch anywhere and tell it what it will do! Power can also be monitored and logged. Example would be tracking and logging how much power refrigeration uses. Or how many times the bilge pump came on. The monitoring of the system is the aspect I am most interested in!
2) Reducing wiring and the complexity of the main electrical panel. This has been building for years as boats have got more and more equipment. Proper wiring protocol means all these must come back to the main electrical panel. So on a modern 40-something sail/cruiser you could have a bundle of wires as big around as your arm. With a distributed power system you just wire the devices up to the nearest “node”. Below are two nodes (each with 10 circuits available on them) in behind the saloon seating. (they aren’t all wired up yet so there will be more wires). If I ever wanted to add something I could just look for a spare connection on the nearest node. I could also add another node if they were all crowded.
Saloon Seating “Nodes”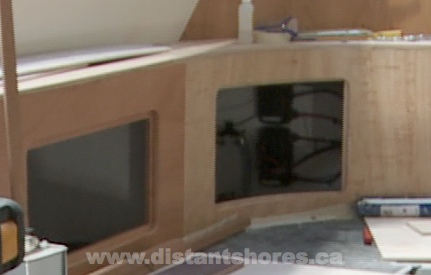
In Search of the Maintenance-free Boat
28/10/09 09:13 Filed in: Maintenance
The last few weeks we have been cruising the Chesapeake Bay and run into a bunch of cruising sailors. Many of them are on their way south for the first time. Besides a bit of nervousness and excitement about the voyage ahead (most are heading for the Bahamas this winter) a common theme is boat maintenance. Living and traveling full-time means things tend to break more often and delays often result. We met one “great-looper” who had spent 2 unplanned years in the Chesapeake Bay while his generator and main ships engine were replaced!!
Here are a few strategies we have picked up or developed over 20 years of cruising to keep maintenance-related delays to a minimum.
Well there you are... 10 basic hints to enjoy a trouble-free cruise.
See you out on the water!
Paul
(Here’s the perfect time to change the zinc on the bowthruster ;-)
Here are a few strategies we have picked up or developed over 20 years of cruising to keep maintenance-related delays to a minimum.
- Plan to be handy - All boats will need maintenance. Old or new power or sail. Upgrade your skills in areas you are weak in. If you don’t understand electrical systems, take a course or study one of the many excellent books. Buy some good tools. If you normally depend on a friendly local mechanic to service your boat you might find it is not so easy to find reliable help as you travel.
- Keep ahead of scheduled maintenance. At least when you’re getting to know a new boat it makes sense to do maintenance on a recommended schedule. For example, buy a rebuild kit for the head (toilet) and install it. You will feel more comfortable knowing you have done it and you may learn if there are any additional spares to keep in stock. With our Jabsco head I also keep sets of the joker valves in addition to a complete rebuild kit.
- Build up a spares kit. This is the heart of the deal for reducing maintenance delays. If you have the parts you need before you need them, and know how to put them in, you could be looking at a 10 minute delay instead of a 4 day delay while you wait for parts. We have a whole locker full of parts on Distant Shores and a separate bin just with engine parts.
- Keep adding to the spares kit. Experienced owners can be a good source of info. Those who have had the same equipment as you have on your boat will know what spares they have needed.
- Keep adding to your tool kit. A good basic tool kit can do most things, but there is often no substitute for the right tool. The job can be oh so quick and satisfying if you have the right tool in your toolkit when you need it. An example is the propellor puller I built some years ago. I also built a cutlass bearing puller so if we were in the boatyard I could easily pull the prop, shaft and cutlass bearing out in less than an hour. Now we have the new boat I am again adding to the toolkit for her new systems. An example is the nice little impeller puller I recently bought. The raw water impeller on the Yanmar now comes off so nice and easily. (the old Volvo impeller came off easily anyway so I didn’t need a puller).
- Get familiar with your boat’s systems. Over the years I have serviced the Barient winches on Two-Step many times. I knew just how they worked and just where the pawls tended to stick after time. Now with Distant Shores we have Lewmar winches. So before they were really meant to be serviced I got out the manual and opened one up to see how it worked and how it differed from the Barients. When it was time to service them I knew what I would find.
- All boats benefit from preventative maintenance. This could mean fixing things before they break, and even servicing things before the manufacturer’s recommended service interval. Not to make too fine a point but marine toilets can be a good place to do early preventative maintenance. Better to service it when you choose than when there is a problem :-(
- Older boats can need much more maintenance as systems age. But new boats will need regular preventative maintenance as well. Read over the owners manuals of the various systems and see what is recommended. Even if a winch is working fine - why not take it apart and see how it looks inside. Order a set of spares for it before you need it. We often carry spare pumps as well as rebuild kits for the pump. It is often quicker to replace the pump and then rebuild the one you have taken out.
- Do not buy an old “Fixer-upper” if you aren’t a proficient handy-person. We have met a number of new cruisers who buy a 20-30 year old boat and are then surprised the maintenance is so much effort. Although a 30 year old fiberglass hull can be in great shape, its systems could all need replacing. A 30 year old engine may be hard to get parts for, the electrical system could need complete replacement and so could the rig and sails. If the owner has just fixed things as they actually break, you could be inheriting a much bigger project than you planned. Even in this economy there is nothing for free...
- Make maintenance fun! Sounds silly but if you can learn to enjoy boatwork then you are more likely to get to it early. It is a very rewarding feeling to see YOU have maintained / improved / serviced the systems on your boat. The boat will work better, there will be less delays in your cruise and you will have that sense of pride that you did it yourself!
Well there you are... 10 basic hints to enjoy a trouble-free cruise.
See you out on the water!
Paul
(Here’s the perfect time to change the zinc on the bowthruster ;-)
Anchors stuck in the Chesapeake Mud
16/10/09 08:07 Filed in: Anchoring | Rocna Anchor
The past 2 days have been windy cold and miserable here in Annapolis. The boat show finished with great weather through the whole 5 days of the show. Now it seems like winter has set in!!! Brrr!
We are anchored in a little creek and getting a chance to test out our anchors in the soft Chesapeake Bay mud. When we were here last year we had trouble in the mud - the only time we had trouble with our Delta 44 (20kg) in the 3 years we have had one. The Delta slipped 4 times in a number of Chesapeake anchorages. I think it is a good anchor but perhaps would have to be bigger for the Southerly 42. At any rate we took the opportunity to re-evaluate anchors and decided to try out the Rocna. We got it in Moorhead City and have now sailed with it for one year, anchoring throughout the Caribbean and Bahamas. It has performed consistently well from sand to grass and some mud. Now we are back in the Chesapeake Mud that was a problem last year.
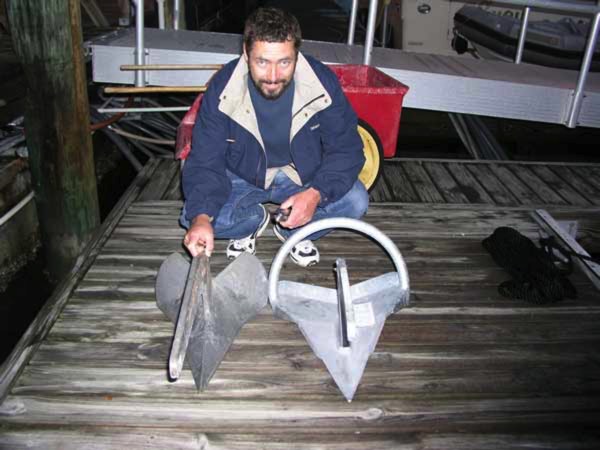
Rocna 25kg on the right - note scoop shape and large surface area.
So how did it do? The short answer is ... Excellent!
First of all, the Rocna is a 25kg anchor so it’s heavier than the Delta we replaced. I very much admire Rocna for standing up and saying they recommend a heavier anchor. The Rocna people have actually sailed and anchored and know you need a serious dependable anchor on the bow of a cruising boat. Most other anchors seem to recommend smaller lighter anchors but in small print they say it is for winds up to 25-30 knots - basically a day anchor/lunch hook. I think our anchor is probably our most important insurance!
I can’t say why exactly but the Rocna seems to have conquered the gooey Bay Mud. It has never slipped here as we have tested it in a few anchorages. The toughest test we have tried is anchoring stern to a dock. In this case the Delta had slipped repeatedly. Now in exactly the same place the Rocna has been great. Once set in, it has held many times the force we achieved last year. Overall this is the best anchor we have tried and are happy to be putting one on the new Southerly 49. We are moving up to a 33kg (73 pound) version.
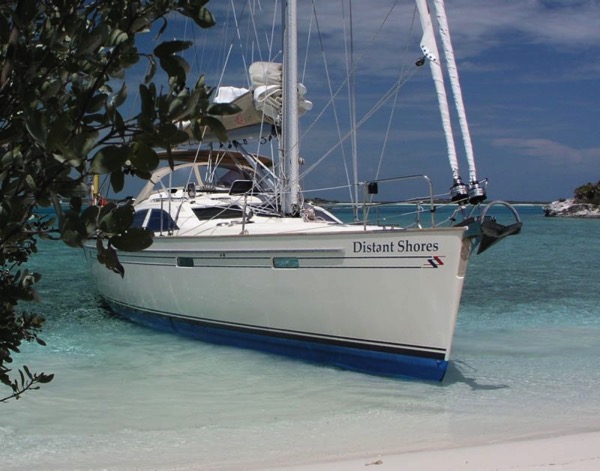
Here’s a shot of the Rocna 25 on our Southerly 42 in the Bahamas this past spring.

Join our email list and get hints, technical articles and tips plus videos to help you achieve your cruising dreams.
We are anchored in a little creek and getting a chance to test out our anchors in the soft Chesapeake Bay mud. When we were here last year we had trouble in the mud - the only time we had trouble with our Delta 44 (20kg) in the 3 years we have had one. The Delta slipped 4 times in a number of Chesapeake anchorages. I think it is a good anchor but perhaps would have to be bigger for the Southerly 42. At any rate we took the opportunity to re-evaluate anchors and decided to try out the Rocna. We got it in Moorhead City and have now sailed with it for one year, anchoring throughout the Caribbean and Bahamas. It has performed consistently well from sand to grass and some mud. Now we are back in the Chesapeake Mud that was a problem last year.
Rocna 25kg on the right - note scoop shape and large surface area.
So how did it do? The short answer is ... Excellent!
First of all, the Rocna is a 25kg anchor so it’s heavier than the Delta we replaced. I very much admire Rocna for standing up and saying they recommend a heavier anchor. The Rocna people have actually sailed and anchored and know you need a serious dependable anchor on the bow of a cruising boat. Most other anchors seem to recommend smaller lighter anchors but in small print they say it is for winds up to 25-30 knots - basically a day anchor/lunch hook. I think our anchor is probably our most important insurance!
I can’t say why exactly but the Rocna seems to have conquered the gooey Bay Mud. It has never slipped here as we have tested it in a few anchorages. The toughest test we have tried is anchoring stern to a dock. In this case the Delta had slipped repeatedly. Now in exactly the same place the Rocna has been great. Once set in, it has held many times the force we achieved last year. Overall this is the best anchor we have tried and are happy to be putting one on the new Southerly 49. We are moving up to a 33kg (73 pound) version.
Here’s a shot of the Rocna 25 on our Southerly 42 in the Bahamas this past spring.
Join our email list and get hints, technical articles and tips plus videos to help you achieve your cruising dreams.
- FREE 1/2 hour video on cruising the Exuma Islands in the Bahamas
- Technical Blog shows you how to deal with issues facing the cruising sailor
- Destination information from some of the world's best cruising areas
- Special discounts and promotions
Southerly 49 in build
20/09/09 05:22
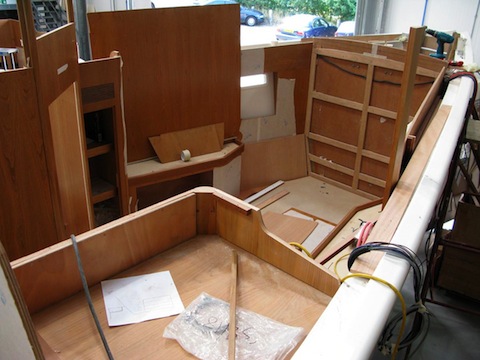
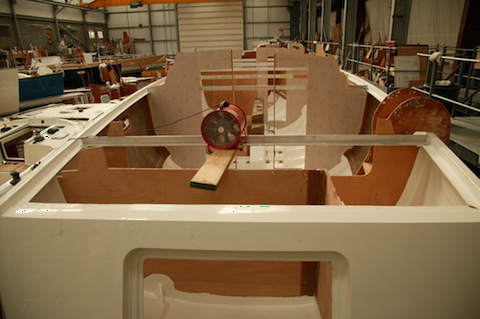
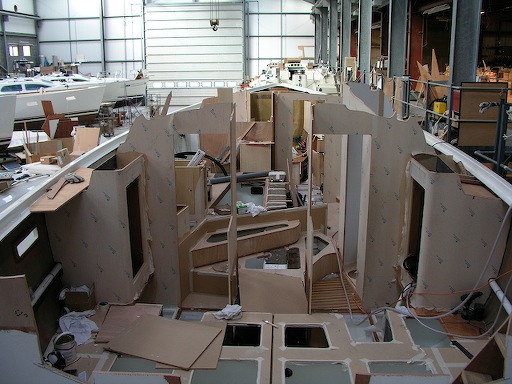
While we were over in England we naturally dropped in at the factory to see the new 49! It all looks to be progressing quite well. The build started in June and will not finish until the end of December - so this is roughly the halfway point. Many of the systems are going in now and you can see quite a lot of cabinetry. This shot shows the aft cabin looking at the port side. The stainless post sticking up at the far left is the port side rudder post. Its angled inward since the rudders have an outward slant to increase their effectiveness when the boat heels.
Here is the forward cabin with the head door on the far left. In the upper right is the forward bulkhead. The 49 has a large forward storage locker ahead of this watertight bulkhead, then another bulkhead and finally the anchor locker at the bow. I think this is a great idea since it means double security in case of collisions.
This is the galley looking aft. Closest on the left is the space for the freezer to drop in. Then the sink, drawers and the stove aft of that. The 49 has a much bigger galley than we had on the 42 and the freezer will be great! Batteries go under the floor in the galley. We have gone for a bigger battery bank - 4 X 185 = 740AH (compared to 450)
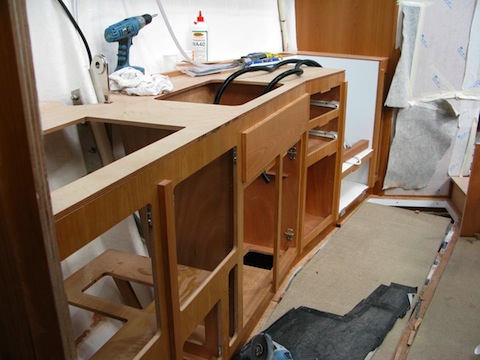
One of the great things about a raised saloon seating area from a weight and design point of view is that it means a lot of heavy things can be located in the large space underneath that raised section. So Northshore has put the water, holding and fuel tanks, generator and batteries very near the center of the boat. Keeping weight central and low means the boat will perform better.
Here is the forward cabin with the head door on the far left. In the upper right is the forward bulkhead. The 49 has a large forward storage locker ahead of this watertight bulkhead, then another bulkhead and finally the anchor locker at the bow. I think this is a great idea since it means double security in case of collisions.
This is the galley looking aft. Closest on the left is the space for the freezer to drop in. Then the sink, drawers and the stove aft of that. The 49 has a much bigger galley than we had on the 42 and the freezer will be great! Batteries go under the floor in the galley. We have gone for a bigger battery bank - 4 X 185 = 740AH (compared to 450)
One of the great things about a raised saloon seating area from a weight and design point of view is that it means a lot of heavy things can be located in the large space underneath that raised section. So Northshore has put the water, holding and fuel tanks, generator and batteries very near the center of the boat. Keeping weight central and low means the boat will perform better.
Raymarine News
18/09/09 06:14 Filed in: Radar | Electronics
The Boat Show is always a good place to get a first look at the new gear that has hit the market, and electronics is always changing quickly. Two years ago when we were outfitting our Southerly 42 it seemed we had such an advanced system! But these last two years has seen a big advance in technology, especially with Radar and chartplotters.
This year at Southampton I got a tour of the new Raymarine “Hybrid-Touch” chartplotters. I have always liked the idea of a touch screen for the obvious convenience, but been leery of using one on a boat with saltwater and spray around. The conductivity of saltwater drips or spray on the screen would make the touch screen think you were touching it. A great idea for an enclosed bridge of a large yacht but not practical for outdoor helm stations.
Raymarine has solved the problem with a very clever mix of the two technologies, hence the hybrid. It looks like the former “C” series plotters with buttons for all functions, BUT it also has a touch interface that can do the same functions. You can switch back and forth between the two seamlessly, press a button then touch the screen. Very neat! But for safety and usability in spray or rough conditions you can deactivate the touch screen.
Check out the demo on their website!
http://www.hybridtouch.com/
Radar is the other big breakthrough. In the last couple of years radar technology has advanced dramatically. “Digital” and “Hi-Definition” are not just marketing slogans. Advances in technology has allowed the brains of the radar to be moved up into the scanner itself, and for it to be much smarter about sending out and receiving the pulses radar uses to see the world. The new Digital radar means the whole radar function is done up in the scanner, then the final image is sent down by a thin ethernet cable instead of the thick bundle of signal cables of last year’s radars (those cables were as thick as a thumb!).
- much improved definition of targets
- smart scanner automatically adapts to surrounding targets
- better detection of weak targets such as rain so should be able to detect a ship within rain
- saves weight and difficulty with cabling
We are very keen to get out on the water and try these new technologies! I will report back!!
Designer Rob Humphreys
17/09/09 06:42 Filed in: Southerly Boats
A highlight of the Southampton show for me was meeting Yacht Designer Rob Humphreys. He has designed a great variety of boats over more than 35 years from racing sailboats to super-yachts. He has worked with Northshore for years improving upon the Southerly Swing Keel and he also designed the Southerly 42. Now he has designed the hull for the new 49. It was largely because I think his hulls are so good that I wanted to sign up for the new 49 even before I had a chance to sail the first one last month!
We had a chance to chat and Rob had a number of comments about the 49, and Southerly’s in general. Rob’s first comment was one I had realized when we sailed our 42 offshore. “Southerly’s are not constrained by the normal design restriction of needing to have a shallow keel. Most keels are a compromise since cruising boats can’t draw too much, or else they would be limited in their harbours and anchorages”. Our 42 draws 9 feet!!
This makes a very good upwind boat and a boat that is very stable at sea in big waves. Basically since the keel will be raised in shallow waters, Rob is free to make a deeper keel than any normal cruising boat or cruiser/racer. We find that swinging the keel down all the way makes the boat roll far less than other boats we have sailed on.
Southerly’s also have a very good motion at sea thanks to the high total ballast. Since the keel will be swung up and down, the boat needs to have sufficient ballast even when the keel is up for safe passaging. This is accomplished by the heavy “grounding plate”, in combination with the keel weight. The combination makes for a smoother ride in rough seas, but the long waterline length makes her fast as well. Here’s the keel and grounding plate for the new 49. HUGE!!
We also talked about the rudders. Having twin rudders means one will always be deeply buried, and since they are angled outward, the working rudder has a good angle as well. A second benefit is that when sailing downwind you have both rudders buried and extra stability.
Finally we discussed swinging the keel up. Its another advantage to the Southerly in that you can raise the keel to any desired position. So sailing downwind in calm seas you can raise it entirely to reduce drag. Or sailing in bigger seas where you still want keel stability to reduce roll you can raise the keel partially. Not only is drag reduced, but you also move the centre of lateral resistance aft making the boat easy to balance downwind. We did this much of the time crossing the Atlantic with the 42.
It was a privilege to meet Rob and now I am really looking forward to sailing the 49 in some more boisterous conditions to see what she can really do!!
LED Update
16/09/09 05:12 Filed in: Electrical
Just back in the studio after a whirlwind 4-day visit to England... dropped in to the yard to see the new 49 then to the Southampton Boatshow... I’ll cover this all in chapters...
LED Lighting Update
Finally it looks like interior lighting can reasonably be done by LEDs! For a couple of years now there have been workable LED Navigation lights, but we had not found a true interior “down light”. Every time I had tested a replacement bulb for the interior it came with glowing and completely unrealistic claims. “50,000 hours”, “no heat”, “saves power” and “replaces a 20 watt halogen bulb”. We have a large bag full of all the rubbish bulbs I have bought and found to be lacking.
50,000 hours - this claim is merely stating the LED manufacturer’s claim that LEDs themselves can last that long before losing too much brightness. It is rarely based on testing by a reputable light manufacturer. The LED light itself consists of more than the LED - there is a circuit called a driver that supplies the LED with the correct voltage and current. Then there is the connection of however many LEDs are used in the light. These have often been quite amateurish looking like someone soldered it all together in the garage. hardly fit for the marine environment and certainly not tested for 50,000 hours. We have had bulbs fail in less than 200 hours.
No Heat! - Another silly claim. In our experience LEDs that produce no heat also produce almost no light. The old LEDs that had 30 small LEDs clustered together didn’t create heat but were so dim we found them unusable. The fact is that LEDs radiate very little other than visible light so don’t feel hot like a halogen bulb. But the driver circuits produce heat.
“replaces a 20 watt halogen” - This seemed to mean they would fit the same fixture. Bulbs we tested before this year didn’t match a 10 watt halogen for output, let alone a 20 watt.
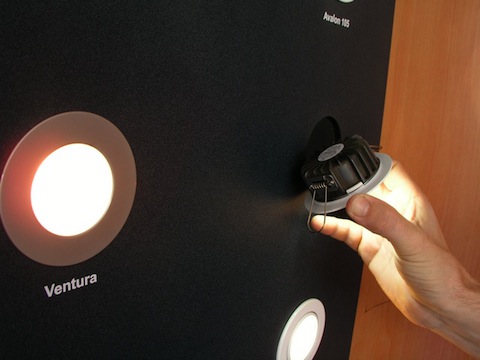
Specialised LED lights. I think part of the problem is that LEDs lights need to be made from the ground up to work with LED technology. Create a housing to marine standards that includes the LEDs, driver and reflector. Test them for light output and compare truthfully to a baseline halogen light.
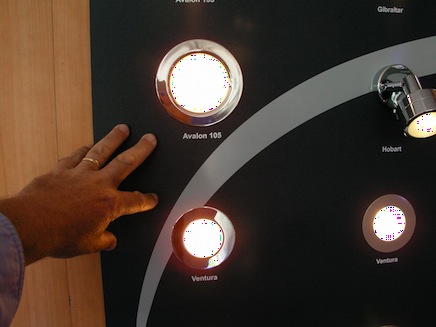
IMTRA has made that commitment to LED lighting. Their stand at Southampton is outside in a bright environment - all the lights are installed and running and are designed from scratch to accommodate LED technology. They have advanced drivers and the lights really are bright.
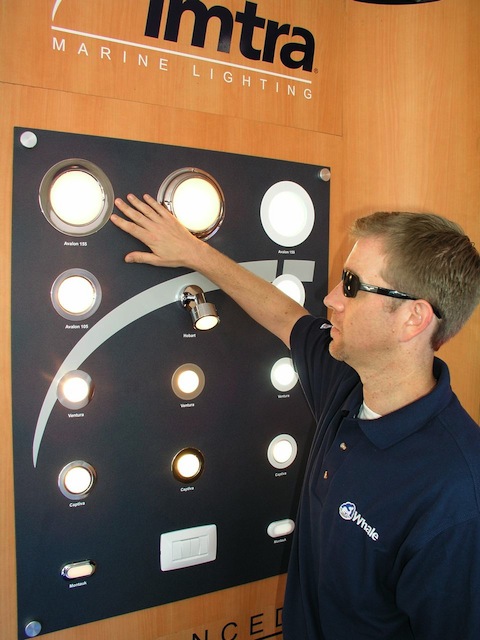
Derek from Imtra in the US was at the show and demonstrated the latest from their extensive LED range. I am FINALLY happy that these lights can really replace the halogens and save power. The lights he showed me are proper replacements for the 20 watt halogens really creating that much light. They use more power than the LEDs I have previously tested since they REALLY DO produce the light. Yet still they use just 5.5 watts each (saving almost 75%). And they look well built with solid heat sinks on the back to absorb the heat from the driver circuit.
More from the show to follow...
- Raymarine Exciting new Radar and Plotters!
- Mastervolt system update
- Chat with Designer Rob Humphreys
LED Lighting Update
Finally it looks like interior lighting can reasonably be done by LEDs! For a couple of years now there have been workable LED Navigation lights, but we had not found a true interior “down light”. Every time I had tested a replacement bulb for the interior it came with glowing and completely unrealistic claims. “50,000 hours”, “no heat”, “saves power” and “replaces a 20 watt halogen bulb”. We have a large bag full of all the rubbish bulbs I have bought and found to be lacking.
50,000 hours - this claim is merely stating the LED manufacturer’s claim that LEDs themselves can last that long before losing too much brightness. It is rarely based on testing by a reputable light manufacturer. The LED light itself consists of more than the LED - there is a circuit called a driver that supplies the LED with the correct voltage and current. Then there is the connection of however many LEDs are used in the light. These have often been quite amateurish looking like someone soldered it all together in the garage. hardly fit for the marine environment and certainly not tested for 50,000 hours. We have had bulbs fail in less than 200 hours.
No Heat! - Another silly claim. In our experience LEDs that produce no heat also produce almost no light. The old LEDs that had 30 small LEDs clustered together didn’t create heat but were so dim we found them unusable. The fact is that LEDs radiate very little other than visible light so don’t feel hot like a halogen bulb. But the driver circuits produce heat.
“replaces a 20 watt halogen” - This seemed to mean they would fit the same fixture. Bulbs we tested before this year didn’t match a 10 watt halogen for output, let alone a 20 watt.
Specialised LED lights. I think part of the problem is that LEDs lights need to be made from the ground up to work with LED technology. Create a housing to marine standards that includes the LEDs, driver and reflector. Test them for light output and compare truthfully to a baseline halogen light.
IMTRA has made that commitment to LED lighting. Their stand at Southampton is outside in a bright environment - all the lights are installed and running and are designed from scratch to accommodate LED technology. They have advanced drivers and the lights really are bright.
Derek from Imtra in the US was at the show and demonstrated the latest from their extensive LED range. I am FINALLY happy that these lights can really replace the halogens and save power. The lights he showed me are proper replacements for the 20 watt halogens really creating that much light. They use more power than the LEDs I have previously tested since they REALLY DO produce the light. Yet still they use just 5.5 watts each (saving almost 75%). And they look well built with solid heat sinks on the back to absorb the heat from the driver circuit.
More from the show to follow...
- Raymarine Exciting new Radar and Plotters!
- Mastervolt system update
- Chat with Designer Rob Humphreys
Going to Southampton
09/09/09 07:32 Filed in: Electrical | Southerly Boats
The Southampton Boat Show begins this weekend and Sheryl & I are going! We went in 2007 and quite enjoyed it. The show is a pretty big in-water boat show and its a nice venue.
This year Northshore will be introducing the new Southerly 49.
Of course we will also be dropping by the factory to see how our 49 is coming along!! I expect big changes since we saw it in early July. The 49 takes almost 6 months to build so we are just approaching the half-way point.
We also like the Boat Show in that it lets us look at all the latest equipment. We are just finalising the design on the electronics with Raymarine and very keen to see what is new since we set up our Southerly 42. New versions of the chartplotter, AIS, and radar are available I think - will report back!
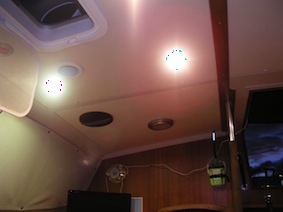
We are also looking at LED lighting. This has been an area where I have been severely disappointed in the past :-( I have bought a number of LED bulbs in attempts to save power but almost all have been either very dim, sickly blue or have died prematurely. The picture above was my best of many bulbs tested - it is almost as bright as the 10watt halogen it replaced and is just slightly greener. Unfortunately it doesn’t work with the dimmer we have on the saloon lights.
I am forced to say LED replacement bulbs are not the way to go. I think LED lighting finally does work but at least for marine lighting it doesn’t make sense to buy a bulb to put in an old fitting. The best is to get an LED light bulb and fixture designed from the ground up for LED technology. Anyway, we shall see what’s at the show.
If any readers are going to be at the Southampton Boat Show, please come and say hi. Sheryl and I will be at the Northshore booth various times over the first weekend (September 10-12).
This year Northshore will be introducing the new Southerly 49.
Of course we will also be dropping by the factory to see how our 49 is coming along!! I expect big changes since we saw it in early July. The 49 takes almost 6 months to build so we are just approaching the half-way point.
We also like the Boat Show in that it lets us look at all the latest equipment. We are just finalising the design on the electronics with Raymarine and very keen to see what is new since we set up our Southerly 42. New versions of the chartplotter, AIS, and radar are available I think - will report back!
We are also looking at LED lighting. This has been an area where I have been severely disappointed in the past :-( I have bought a number of LED bulbs in attempts to save power but almost all have been either very dim, sickly blue or have died prematurely. The picture above was my best of many bulbs tested - it is almost as bright as the 10watt halogen it replaced and is just slightly greener. Unfortunately it doesn’t work with the dimmer we have on the saloon lights.
I am forced to say LED replacement bulbs are not the way to go. I think LED lighting finally does work but at least for marine lighting it doesn’t make sense to buy a bulb to put in an old fitting. The best is to get an LED light bulb and fixture designed from the ground up for LED technology. Anyway, we shall see what’s at the show.
If any readers are going to be at the Southampton Boat Show, please come and say hi. Sheryl and I will be at the Northshore booth various times over the first weekend (September 10-12).
Erie Canal & Construction update
04/08/09 07:15 Filed in: Canals | Southerly Boats
We’ve been busy in the studio since we got back from England 2 weeks ago. We have a lot of TV shows to get out after a fabulous year sailing. This is always a fun time since we get to relive our trip as we edit the shows! I have been working on the trip from New York down the Oswego and Erie Canals to the Hudson and then down the 140 miles to New York City. This is a very fun trip and is the start of “The Way South” for anyone in the Great Lakes who wants to make the journey to Florida, the Bahamas or the Caribbean.
Here are a couple of pix of the trip...
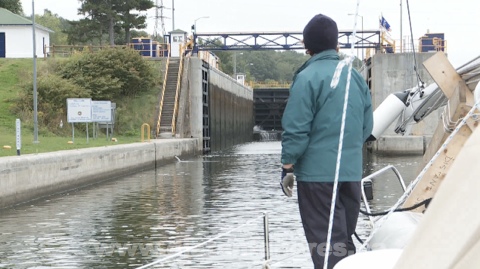
Entering a lock as we go up the Oswego Canal
Investigating a lock from the old system - circa 1835

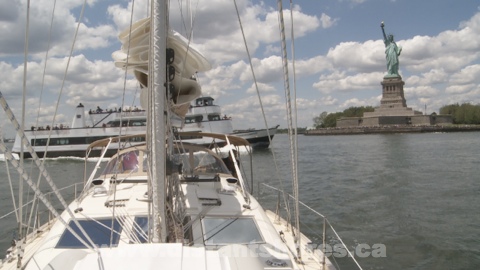
An interesting statue we saw ;-)
I do really enjoy editing the shows we shot since we get to relive the trip and hopefully provide useful information for viewers - who may be planning the trip themselves!!
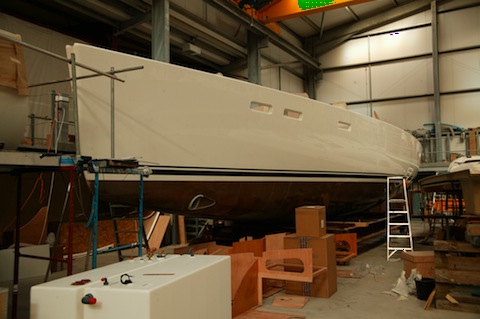
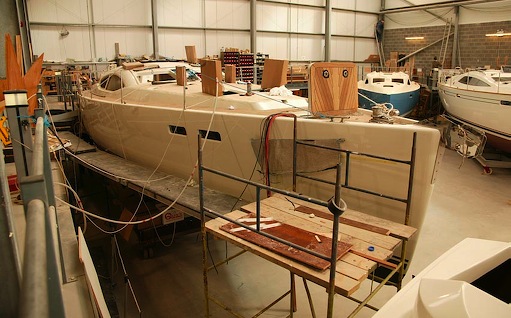
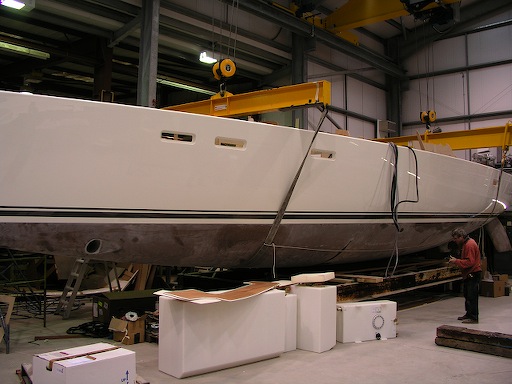
While in the studio - the folks at Northshore are kindly sending along updates of the new 49 - here are a couple of shots of her in the shop. As you can see she is out of the mould now. Northshore like to leave the boats in the mould at least a few weeks until the glass has cured completely and the bulkheads are in to make her absolutely solid. Not all builders take such care.
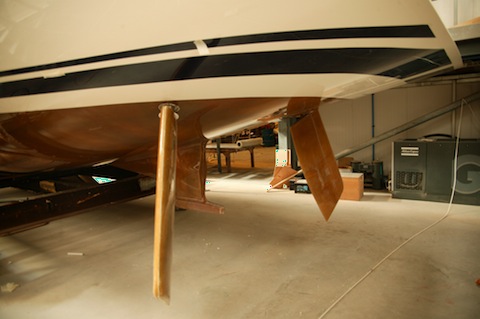
The rudders are installed - not connected inside yet hence the unusual angle!
Most bulkheads are in already. Note the white coating over most of the inside of the hull. This is called a White Flo coat and is a special gelcoat that is meant to protect the inside of the hull and make it easier to clean. When we built Two-Step we had a lot of rough bits of fiberglass in the bilges that occasionally would catch a finger when you reached in or tried to clean up. It is a common problem with fiberglass boats - this should fix it.

Here are a couple of pix of the trip...
Entering a lock as we go up the Oswego Canal
Investigating a lock from the old system - circa 1835
An interesting statue we saw ;-)
I do really enjoy editing the shows we shot since we get to relive the trip and hopefully provide useful information for viewers - who may be planning the trip themselves!!
While in the studio - the folks at Northshore are kindly sending along updates of the new 49 - here are a couple of shots of her in the shop. As you can see she is out of the mould now. Northshore like to leave the boats in the mould at least a few weeks until the glass has cured completely and the bulkheads are in to make her absolutely solid. Not all builders take such care.
The rudders are installed - not connected inside yet hence the unusual angle!
Most bulkheads are in already. Note the white coating over most of the inside of the hull. This is called a White Flo coat and is a special gelcoat that is meant to protect the inside of the hull and make it easier to clean. When we built Two-Step we had a lot of rough bits of fiberglass in the bilges that occasionally would catch a finger when you reached in or tried to clean up. It is a common problem with fiberglass boats - this should fix it.
UK Visit to see 49 #1
21/07/09 07:53 Filed in: Southerly Boats
Whew what a whirlwind! After a great passage up from the Bahamas to Beaufort in just 3 days we made a quick run through the ICW to Norfolk and the Chesapeake Bay to Solomons Island. Our plan is to base out of there for the summer while we are back in the studio working on the new TV shows. We will be editing the first 6 episodes by the end of September.
But before we got down to work we made a quick visit to the Northshore factory in England to see the first Southerly 49 - just launched and looking very racy down at the dock in Itchenor.

Luckily the boat was free for us to take her out for a spin! First impressions are great! We only had light winds but wow does she go. We managed 6 knots in just 7-8 knots of breeze!!! We scooted right past ALL the other boats out that day.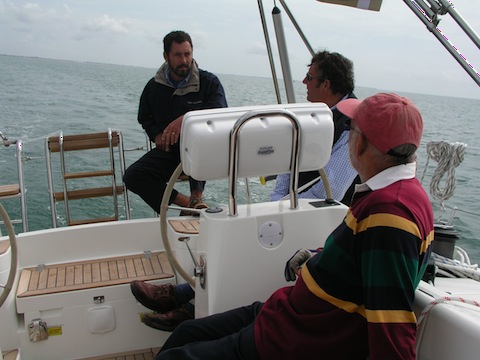
We also got a look at our new 49 in build in the factory. Just early stages yet but a thrill nonetheless to walk around in the hull
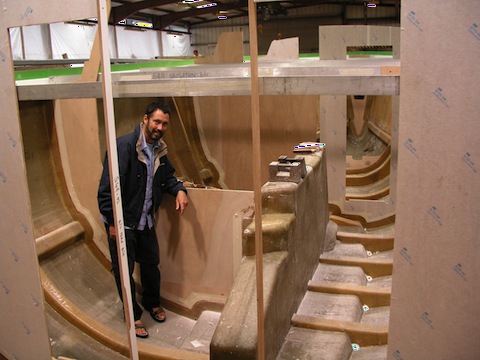
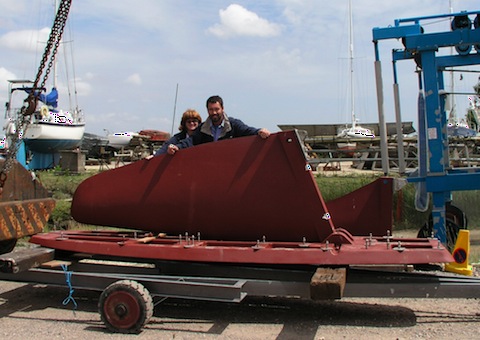
As usual the factory is humming - full to capacity with a waiting list for new boats. The “economic slowdown” doesn’t seem to have affected Southerly sales. I think the Southerly secret is the keel. They really are the only game in town for “variable draft cruising” with their lifting keel. They have perfected it after over 25 years of building these boats. And look at the keel. It isn’t a centerboard or any other kind of compromise keel. Here is the keel for our new 49. Beautiful. A true airfoil shape with over 10 foot draft!!

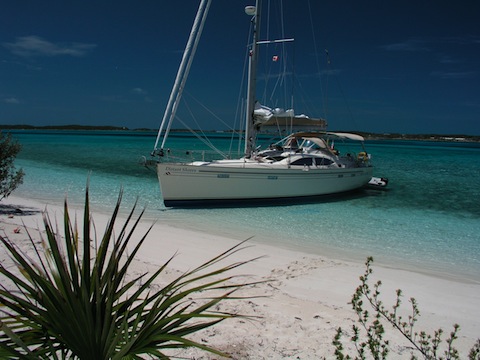
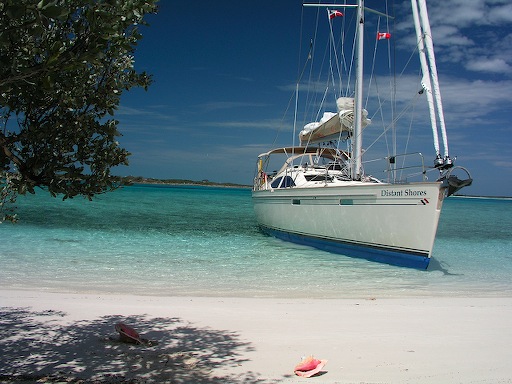
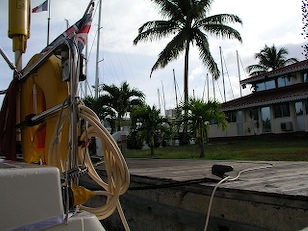
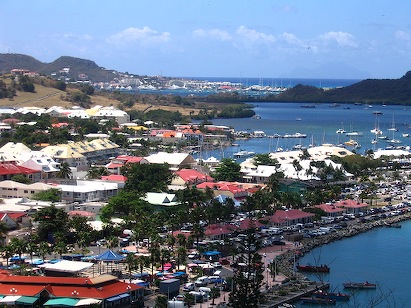
That means we can still sneak into the shallows since the boat draws just 2’10” with the keel swung up as it is in the picture above. So we can go places like the picture below...
But before we got down to work we made a quick visit to the Northshore factory in England to see the first Southerly 49 - just launched and looking very racy down at the dock in Itchenor.
Luckily the boat was free for us to take her out for a spin! First impressions are great! We only had light winds but wow does she go. We managed 6 knots in just 7-8 knots of breeze!!! We scooted right past ALL the other boats out that day.
We also got a look at our new 49 in build in the factory. Just early stages yet but a thrill nonetheless to walk around in the hull
As usual the factory is humming - full to capacity with a waiting list for new boats. The “economic slowdown” doesn’t seem to have affected Southerly sales. I think the Southerly secret is the keel. They really are the only game in town for “variable draft cruising” with their lifting keel. They have perfected it after over 25 years of building these boats. And look at the keel. It isn’t a centerboard or any other kind of compromise keel. Here is the keel for our new 49. Beautiful. A true airfoil shape with over 10 foot draft!!
That means we can still sneak into the shallows since the boat draws just 2’10” with the keel swung up as it is in the picture above. So we can go places like the picture below...
Stringers in hull
20/06/09 17:33 Filed in: Southerly Boats
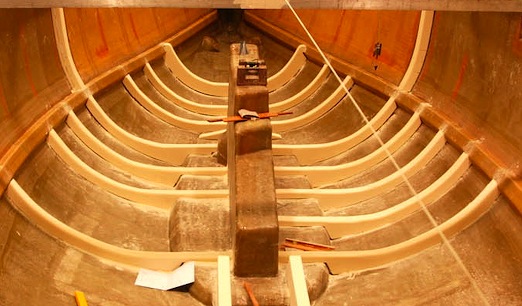
Next after moulding the hull is to reinforce it with a stringer grid. This is made of foam and will be heavily laminated with fibreglass. The fibre is the real strength forming a box section. You can see how many stringers are there down under the waterline.
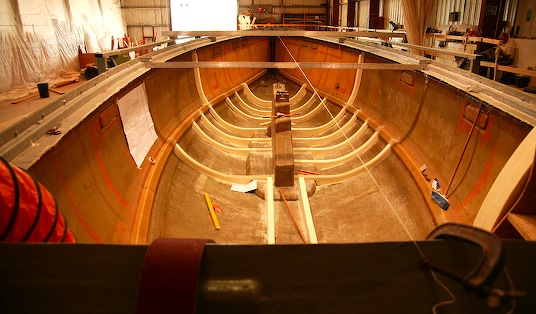
In the middle you can see the keel box. The keel will be set in this and bolted in. When the keel is retracted it will swing up into this box. This is why no water comes into the boat from the lifting keel ;-)
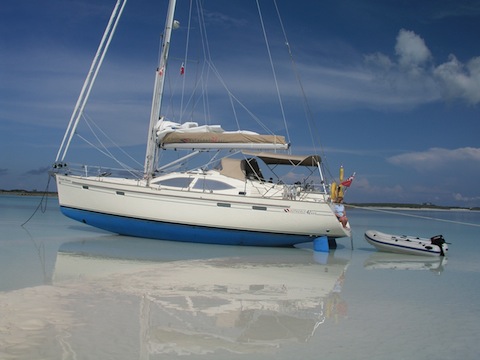
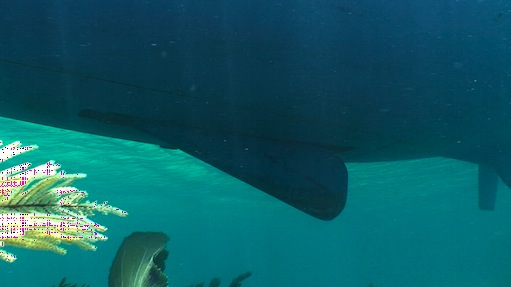
Here is a shot from a few days ago crossing from Exuma Islands to Eleuthera - 40 miles of water only 15 feet deep. I went overboard to get film of the boat passing near a coral head (which was about 30 meters diameter) you can see the outline of the keel plate set into the bottom of the boat. The keel is mostly retracted. We like to keep it this way if we are exploring in shallow water. This way it acts as a safety in case we come into shallower water than we meant to. The keel will touch first and we slow down (since the keel weighs 3500 pounds it acts as a brake).
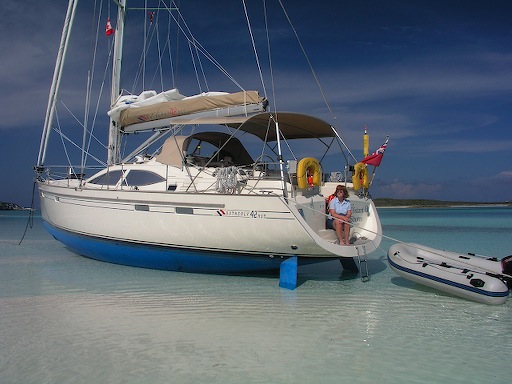
With the keel up and retracted the bottom of the boat is flat in the centre so you can beach and sit flat. Here is a shot from a week ago in the Exumas where we beached Distant Shores on a sandbank. The boat is sitting safely on the keel plate and the prop skeg. Its low tide. There is roughly 3 feet of tide in the Bahamas.
In the middle you can see the keel box. The keel will be set in this and bolted in. When the keel is retracted it will swing up into this box. This is why no water comes into the boat from the lifting keel ;-)
Here is a shot from a few days ago crossing from Exuma Islands to Eleuthera - 40 miles of water only 15 feet deep. I went overboard to get film of the boat passing near a coral head (which was about 30 meters diameter) you can see the outline of the keel plate set into the bottom of the boat. The keel is mostly retracted. We like to keep it this way if we are exploring in shallow water. This way it acts as a safety in case we come into shallower water than we meant to. The keel will touch first and we slow down (since the keel weighs 3500 pounds it acts as a brake).
With the keel up and retracted the bottom of the boat is flat in the centre so you can beach and sit flat. Here is a shot from a week ago in the Exumas where we beached Distant Shores on a sandbank. The boat is sitting safely on the keel plate and the prop skeg. Its low tide. There is roughly 3 feet of tide in the Bahamas.
Moulding the hull
17/06/09 08:06 Filed in: Shoal draft
Hi from the Bahamas - just a quick note as we are filming today in Harbour Island Eleuthera.
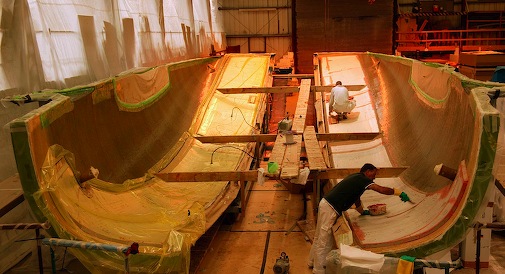
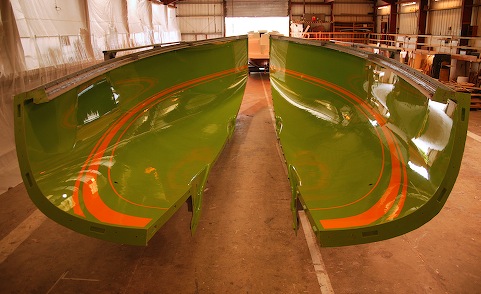
Here are a couple of shots of the new boat being moulded in the factory. Note the first part of the lay-up is done with the hull in two separate pieces which allows easier access and allows the hull pieces to be turned on their sides as you see here. So the port side of the boat is on the right and the starboard half of the hull is on the left
Note also that the upper part in the photo is greenish. This is actually the mould itself we are seeing with just a thin gelcoat applied. Northshore use a clear gelcoat as an osmosis shield as part of their Nordseal barrier system. So the area in green is below the waterline.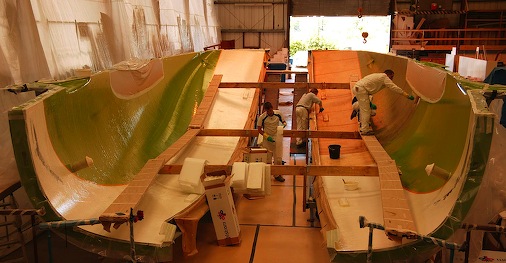
More laminate applied as the process continues. You can also see the core above the waterline being applied with vacuum bags (which is on the bottom of the picture as the hull pieces are on their sides.
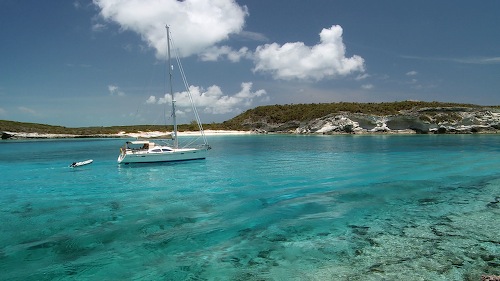
Now here are a couple of picture from the lovely Bahamas where we are currently filming on location for the Distant Shores TV series. Once again on this trip we are amazed that these islands aren't more visited. They are surely the best cruising area available to boaters on America's East Coast. The shallow water does scare some people off, but you can learn to handle it even with deeper draft boats (up to 6 feet draft is possible). But throughout the islands people are jealous of our less than 3 foot draft. Even the new 49 will draw less than 3 feet with the keel pulled up.
A number of the routes and anchorages we have been in the past month have only been accessible since we were shallow and also could dry out. More on the keel and drying out/bahamas strategies in further blogs. Now off filming...

Here are a couple of shots of the new boat being moulded in the factory. Note the first part of the lay-up is done with the hull in two separate pieces which allows easier access and allows the hull pieces to be turned on their sides as you see here. So the port side of the boat is on the right and the starboard half of the hull is on the left
Note also that the upper part in the photo is greenish. This is actually the mould itself we are seeing with just a thin gelcoat applied. Northshore use a clear gelcoat as an osmosis shield as part of their Nordseal barrier system. So the area in green is below the waterline.
More laminate applied as the process continues. You can also see the core above the waterline being applied with vacuum bags (which is on the bottom of the picture as the hull pieces are on their sides.
Now here are a couple of picture from the lovely Bahamas where we are currently filming on location for the Distant Shores TV series. Once again on this trip we are amazed that these islands aren't more visited. They are surely the best cruising area available to boaters on America's East Coast. The shallow water does scare some people off, but you can learn to handle it even with deeper draft boats (up to 6 feet draft is possible). But throughout the islands people are jealous of our less than 3 foot draft. Even the new 49 will draw less than 3 feet with the keel pulled up.
A number of the routes and anchorages we have been in the past month have only been accessible since we were shallow and also could dry out. More on the keel and drying out/bahamas strategies in further blogs. Now off filming...
Prepping the hull mould
29/05/09 08:26
Here are a couple of shots of the mould of the new boat. To get a perfect finish the mould has to be meticulously checked over and carefully polished. 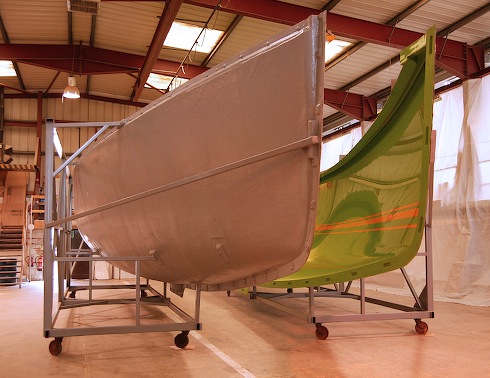
Note the orange stripe lines. These are to show the layup crew where to put the waterline. Coloured gelcoat is applied to the mould using the orange as a guide to become the waterline on the finished hull. Some manufacturers use tape for the bootstripe lines but Northshore use gelcoat since it will be much longer wearing. It is the area that needs a frequent scrubbing since it is right near the water.
Observant viewers will note the caprail is moulded into the hull on this boat. (see the overhanging lip at the top of the mould. The deck sits on this and is joined there rather than being joined on the caprail. This means we have a solid glass caprail instead of a decorative teak one as on the 42. The join is covered by the teak decking. So the new boat has no decorative teak outside. We do have the lovely teak decks and teak cockpit floors/seats but no other teak. I do very much like the great footing of teak decks but don't like maintaining decorative teak (either with varnish Cetol or whatever). The teak cockpit floors/seats on our 42 have been great and only require a scrub every month or two.
Now here's a picture to inspire .... as we are cruising the Bahamas and working on the 6th season of the Distant Shores TV series. This is a wonderful place if you have a shallow draft like the Southerly. (note the new boat still draws less then 3 feet despite being 6 feet longer!). We will be here for a few more weeks then jumping of to the Chesapeake Bay.

So we can still beach her like this. We do get to meet lots of people who come to see if we are all right ;-)
Note the orange stripe lines. These are to show the layup crew where to put the waterline. Coloured gelcoat is applied to the mould using the orange as a guide to become the waterline on the finished hull. Some manufacturers use tape for the bootstripe lines but Northshore use gelcoat since it will be much longer wearing. It is the area that needs a frequent scrubbing since it is right near the water.
Observant viewers will note the caprail is moulded into the hull on this boat. (see the overhanging lip at the top of the mould. The deck sits on this and is joined there rather than being joined on the caprail. This means we have a solid glass caprail instead of a decorative teak one as on the 42. The join is covered by the teak decking. So the new boat has no decorative teak outside. We do have the lovely teak decks and teak cockpit floors/seats but no other teak. I do very much like the great footing of teak decks but don't like maintaining decorative teak (either with varnish Cetol or whatever). The teak cockpit floors/seats on our 42 have been great and only require a scrub every month or two.
Now here's a picture to inspire .... as we are cruising the Bahamas and working on the 6th season of the Distant Shores TV series. This is a wonderful place if you have a shallow draft like the Southerly. (note the new boat still draws less then 3 feet despite being 6 feet longer!). We will be here for a few more weeks then jumping of to the Chesapeake Bay.
So we can still beach her like this. We do get to meet lots of people who come to see if we are all right ;-)
New Southerly
16/05/09 07:01
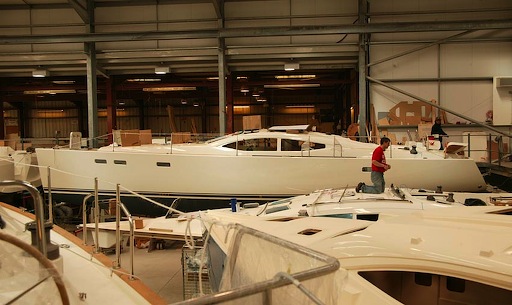
Here are a few images of the first 48 in the factory in build...
We will be getting hull number 2 of this boat so of course we are looking closely at all the images to see exactly how things will be set up. Although we have poured over the plans to get a good picture of the boat, photos will help even more.
From the side you can see she is quite similar to the 42. Raised Saloon which we love! Aft cockpit. Long waterline.
Looking at the dimensions shows a different emphasis in the design.
LOA increases from 42.2 feet to 48.5 - an increase of 15%
and waterline length has a similar increase... but...
Beam increases from 13.2 to 13.7 - just 6 more inches or just 4%
Keel/Ballast weight is up from 8,091 to 11,530 lbs - a 42% increase
This should mean a much more powerful and faster hull...
Looking at the keel, draft increases from 8.9 feet to 10.2 (thats over 3 meters!!!)
but raising the keel still has the draft less than 3 feet - just 2 foot 10 versus 2 foot nine.
So basically the new boat is a sleeker version of the 42. More than 6 feet longer and with a much deeper keel but only 6 inches wider.
Although bigger than the 42 and much of that length is in the bow section. She is a very sleek boat and should be very fast (not that the 42 wasn't quite fast - the 48 will be FASTER)
Note the teak side decks with the genoa track mounted on them. The 48 is designed with our favourite double headsail rig as a standard feature (it was an option on the 42). The decks are wider and the teak will be nice to give good footing when you go forward at sea.
Well that's it for now, more updates soon!
Mediterranean Mooring - stern to the dock
22/04/09 06:14 Filed in: Anchoring
We got the chance to put our Lewmar Auto-Anchor to the test and try our first stern to the quay mooring using the system. From our years spent in the Med we are quite comfortable mooring stern-to and I thought I would describe the procedure for those who haven't tried it before.
Many marinas provide a straight dock without finger piers or pilings to tie the boat to. There are just cleats or bollards along the dock. Boats drop their main anchor away from the dock and back in, throwing stern lines ashore to secure the boat to the quay. The anchor will hold the boat away from the quay. Besides being cheaper to build marinas, the dock can accommodate any or width of boats this way. This system is quite common in the eastern Med.
Step 1 - choose the spot to drop your anchor. The marina pointed us to our place between two large catamarans. Looking at the boats you can guess where their anchors are as you will be looking down their anchor chains. Try to divide that distance so the boat will be centred in the slip. You will need good scope for your anchor so calculate a distance from the dock that will result in minimum 5-6 to 1 scope. More is better if there is room but remember you must have enough chain to allow you to reach the dock :-)
Step 2 – line the boat stern up so you point stern to the quay and drop the anchor. It depends on how your boat handles but if there is a crosswind I position the boat slightly upwind before dropping the anchor in the chosen spot. Now drop the anchor.
Step 3 – Back up towards the quay dropping chain out as you go. Initially you will need to keep it slack but once some chain is out you can tug it gently to set the anchor. When you have enough scope out, you can set the anchor by giving it a stronger pull. This is why its better to have a bit more scope out so you can set the anchor and know its holding before you get all the way stern to the quay.
HINT: Our old boat Two-Step was a long-keeled boat and was terrible to control in reverse. But Med-mooring was easy because we had the anchor out as an extra control. As we backed up the wind would blow the bow around but we could then put a little tension on the anchor chain and use this to straighten the bow out again. Sheryl stayed up at the bow and worked the old manual anchor windlass letting the chain out slowly until we got near enough to the dock to throw a line ashore. When we got turned she would stop the chain and the bow would pull around back into line.
Step 4 – Come in between the boats on either side and tie up. We have all our fenders out with one reserved as a “roving” fender in case we jostle our new neighbours. Once you get in between the other boats you have done the hard part. Now toss a line ashore if there is someone waiting. If not then you can come in close and lassoo a piling. This is one time where having control of the windlass from the helm really pays off. As we backed up to the quay here in Guadaloupe I was able to see the amount of chain we had out, and let it out myself as we backed in. This left Sheryl free to manage the roving fender when we got close to the other boats.
Step 5 – Tie up. With lines ashore now is the time to tighten up on the anchor chain to make sure your anchor is well set and will hold you off the dock. There can be quite a strain on this in a stiff crosswind so you need to be certain it isn't dragging. I use the engine in reverse to pull the boat in, tie the lines as tightly as we need to keep the boat in to the quay. Tighten up on the anchor chain as needed and make sure you are not dragging. If it is slipping you might be able to set it by pulling or you may need to go out and try again!!
Step 6 – Tidy up. I put an anchor snubber on to take the strain off the windlass. This is a chain hook on a length of line. I put it on the chain just off the bow, pull it tight on a cleat and then let tension off the windlass. Voila – anchored stern to the quay.
Additional Hints:
- know the length of your chain. Nothing is more embarrassing than backing in perfectly and finding you are still 6 meters away from the dock and you have reached the end of the chain!! Many boats that moor this way often have 80 or 100 meters of chain or more.
- try not to cross the next boat's anchor chain. If all the chains are lined up parallel then there will be no problems. But if you cross over their chain and they leave first, they will pull out your anchor.
- the chain counter and control at the helm is a great asset when Med Mooring. I have watched our Greek friend Thanos in Rhodes, bring a 50-footer in to the dock all alone and do a perfect stern-to mooring.
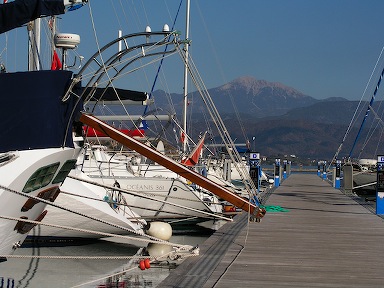
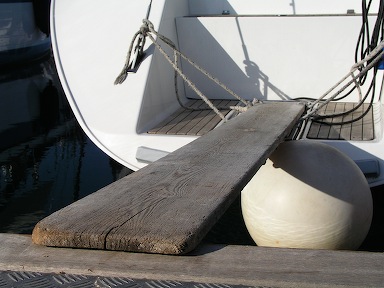
- a passarelle is useful since it is not always easy to get off the stern. Many boats have fancy custom affairs that get quite elaborate. The best are motorized and extend out of a hatch at the stern, sensors maintaining their height above the dock as the tide changes! On Two-Step we carried a simple 2X10 plank about 7 feet long (a gift from Thanos!)
Anchor Chain Counter and control at helm
10/04/09 17:43 Filed in: Anchoring
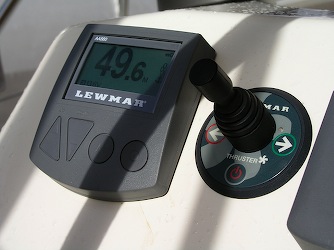
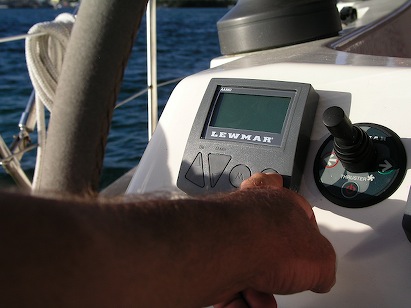
This is a very cool add-on for an electric windlass!! I have just finished the installation of an "Auto-Anchor" for our Lewmar H3 windlass. This is a device that counts the chain you have down and displays this at the helm. But it also lets you control the windlass from the helm, so if you want to let more chain out you can do it from the helm. We have seen this used in the Med where you are mooring up against the quay. Drop the anchor say 100 feet away from the dock, then back up while letting the chain out. Tie to the dock and snug up the chain so it keeps you from bumping back on the dock. This is especially easy if you have a chain counter and remote at the helm. Then one person can dock the boat this way!
For the installation I had to mount the control at the helm. 3 screw holes plus a hole for the wires. Easy!
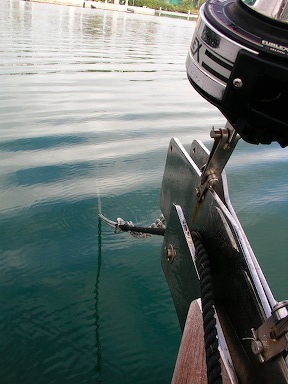
Next the more difficult bit. Wiring it in. There are sensor wires that run from a magnetic sensor in the windlass to tell the box each time the windlass rotates. This allows it to count the chain. Then there are the control wires to let the device control the solenoid for the windlass. Since we already have a control up at the bow, we will splice into this to have the "AutoAnchor" work in parallel.
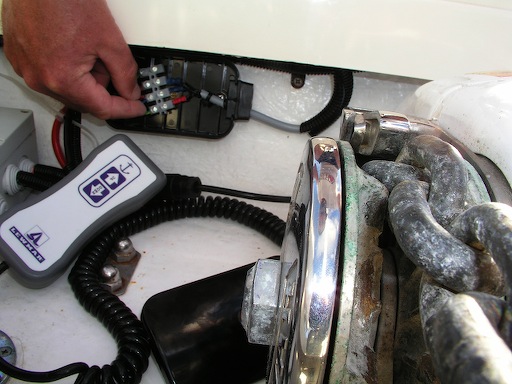
I put the splice in a waterproof junction box since the locker gets spray in when beating to windward.
Now hook up the power and voila!
Switch it on and find the machine gives me an error saying I have hooked up the power incorrectly! How about that?? This is one clever device. Email technical support at AutoAnchor... They send a nice wiring diagram that shows what I have done wrong...
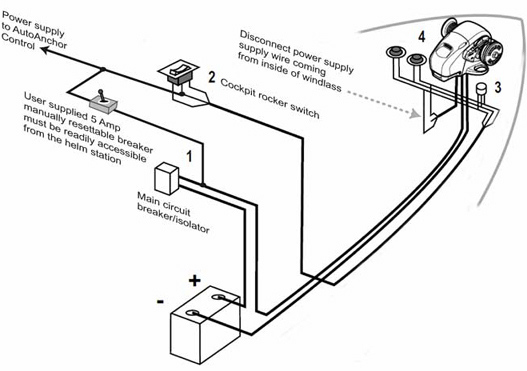
The secret is the fact that the existing windlass switch was taking power from the windlass itself to operate the switch. The AutoAnchor wants to be connected to a circuit breaker from the panel. So now there are two parallel paths for power to get into the AutoAnchor unit. I guess this must happen often since they have even written an error message for it...
So I clip the wire from the windlass power, rerun power to the forward switch from the AutoAnchor and FINALLY it works.
Cool device. Next is to test it...
Up button makes it go up. Down makes chain go down. Control at bow still works. Chain counter counts chain...
Now I just have to get the anchor up from this sticky mud in the St Martin Lagoon and set sail. This really is the best place to take a break and work on the boat. Chandleries abound, I can get wifi from a completely protected anchorage in the lagoon, and there are French restaurants and pastry shops just a short dinghy ride away.
For the installation I had to mount the control at the helm. 3 screw holes plus a hole for the wires. Easy!
Next the more difficult bit. Wiring it in. There are sensor wires that run from a magnetic sensor in the windlass to tell the box each time the windlass rotates. This allows it to count the chain. Then there are the control wires to let the device control the solenoid for the windlass. Since we already have a control up at the bow, we will splice into this to have the "AutoAnchor" work in parallel.
I put the splice in a waterproof junction box since the locker gets spray in when beating to windward.
Now hook up the power and voila!
Switch it on and find the machine gives me an error saying I have hooked up the power incorrectly! How about that?? This is one clever device. Email technical support at AutoAnchor... They send a nice wiring diagram that shows what I have done wrong...
The secret is the fact that the existing windlass switch was taking power from the windlass itself to operate the switch. The AutoAnchor wants to be connected to a circuit breaker from the panel. So now there are two parallel paths for power to get into the AutoAnchor unit. I guess this must happen often since they have even written an error message for it...
So I clip the wire from the windlass power, rerun power to the forward switch from the AutoAnchor and FINALLY it works.
Cool device. Next is to test it...
Up button makes it go up. Down makes chain go down. Control at bow still works. Chain counter counts chain...
Now I just have to get the anchor up from this sticky mud in the St Martin Lagoon and set sail. This really is the best place to take a break and work on the boat. Chandleries abound, I can get wifi from a completely protected anchorage in the lagoon, and there are French restaurants and pastry shops just a short dinghy ride away.
Re-Visit Northshore - New Southerly 48
20/03/09 07:52

I was also interested in how the company was doing in the midst of the world news of economic slowdown. On that front I shouldn't have worried. Even the new plant building that wasn't online when we set sail from the dock in November 2007 was mostly full. Business seems to be going quite well. The UK£ is down against the Euro and the US$, so maybe that's partly responsible, making the Southerly more affordable. At any rate it was nice to see such a busy shop.
The new 57-footer is well under way - the plug is completed and will be moulded shortly. Like all Southerlies, the 57 has a swing-keel and will draw just over 3 feet with the keel up.
Here is the new Southerly 48 in the shop.
The new 48 is much closer to completion. Hull and deck are complete. The interior is coming together and plans are to launch her in late spring. She looks like a very fast and spacious boat. In many ways like a bigger faster version of our 42. This is definitely a boat to watch and I will keep up with this model as she gets further along.
Battery Capacity Revisited
14/03/09 08:25 Filed in: Electrical
Well we have lived on Distant Shores for almost 1 and a half years now and I thought it was time to revisit the issue of Battery Capacity.
How did my original electrical budget work out? How do the Mastervolt AGMs work? Did we use more or less than planned?
The budget was fairly close. Of course it is always hard to judge in advance what total use would be and there are going to be changes based on where and how you cruise. Luckily our Mastervolt power system includes a battery capacity monitor so we have been able to see total power used and judge how we are doing.
Basically our budgets were fairly close... most of the time. I said we would need 130AH while at anchor. This is true if we anchor and swim/read/explore etc. The difference is if we get out the computers and do a few hours of work! On Two-Step we didn't do that often since there wasn't really space. But with Distant Shores we have the space and occasionally have a day at anchor where we catch up on work, emails, and even some rough editing on the television show. The computers are power users and put us over our budget. Running a typical laptop will use 3-4amps so running both of ours for 5-6 hours is a big 40 addition to the budget.
At sea was where I had thought we would be closer to the line with a budget of 200AH per day. This has turned out to be close. I think it is around 220 in practice. Luckily the boat is very easily steered and the autopilot uses less than Two-Steps pilot to keep her on course. But the instruments are fairly heavy users. We have two plotters, the big E120 down in the nav station and the Raymarine E80 out in the cockpit. Those both use a fair bit. They are wonderful devices and well worth it but I didn't budget correctly for them. The E80 draws roughly 2 amps and the E120 about 2.5. Then I discovered that it wasn't really the plotters themselves, but the backlighting. So at night when we dim them the draw is almost 1/2. At any rate, the budget for the ship at sea is really around 220 AH. This is really a bit close to the line with the batteries we have.
Our ships battery bank includes 2 big house batteries. David at Mastervolt wanted us to use 3 - totaling 675 AH of house capacity. I decided the 42 couldn't accommodate all three since the third would have had to go in a separate custom battery box. So we have two totaling 450AH power and on long passages we have to run the engine more than once a day. In practice we run the engine for an hour each morning and evening.
If we were to do it again I would find some way to follow David's recommendation and fit 3 of the big Mastervolt AGM.
How have the AGM worked out? Well these Mastervolt AGMs are my first experience with the batteries and they are brilliant. AGMs charge quickly, do not require maintenance, do not vent fumes and do not discharge themselves when left for a while. All in all they are great. On Two-Step we used to be checking our batteries, filling them with water regularly and cleaning up the spills. The AGMs just sit there and look just the day they were installed.
Note the black thing that is stuck to the left hand battery... this is a temperature sensor. To look after any battery is important to having them give good performance over a long life. The temperature sensor ensures that the big 100Amp battery charger we have is not over heating the batteries, and that they are being charged at the correct rate.
Got to run! Next time I will report on my recent visit to the Northshore Yard (builders of our Southerly 42).
Upwind to the Caribbean
01/03/09 07:22 Filed in: Offshore sailing
Sorry not to have added to my blog in a while... I am going to try and get caught up!! My last was back in the fall and we have done a LOT since. I will start with our passage to the Caribbean since it is something many people are planning at some time in their sailing career.
There are two main strategies for a North American boat wanting to get to the Caribbean...
1) The Thorny Path - jumping from island to island through the Bahamas, Turks & Caicos, Dominican Republic and Puerto Rico. (yellow arrows)
2) Offshore - directly offshore from Beaufort or North of there to the BVI. (red arrow directly fro Beaufort North Carolina)
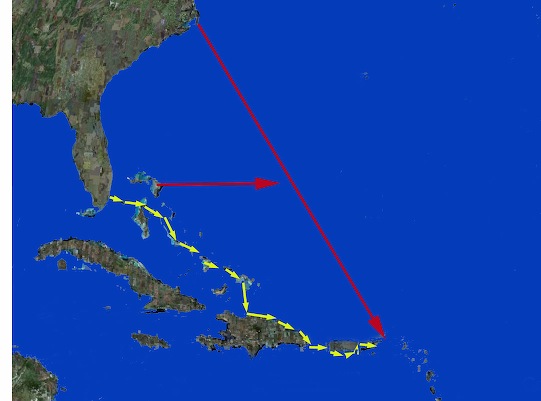
Our plan was to modify the second option and jump off from the Bahamas heading directly east to join the offshore route, then head SE to the Caribbean. This would be a passage of over 1000 miles and the prevaiing winds are from the east so this initial easterly push would be dead into 15-20 knots. My plan was to wait for a cold front, and use the wind shift to hitch a ride and hopefully gain some easting that way.
With option 1) The Thorny Path, one might spend 2 months getting south. Our option 2) would take 2 weeks (one waiting for a front then 7-8 days sailing direct tp the Caribbean.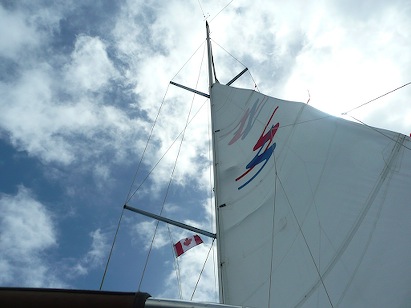
Of course any boat planning this must be completely prepared for some tough going. The front means you might be out in 30-40 knots of wind as the front passes, and the rest will be close hauled in 15-20 or higher.
Distant Shores is a very good boat for this passage since she is quite good close hauled. We swung the keel all the way down to our full draft of 9-feet, and with our long waterline we go upwind very well.
It was also important to be able to go fast enough that we would be able to stay with the front. The idea that as the front approaches the winds will clock around from the proveailing Easterly, to South East, then south. Then they will build in strength and clock further to the South West. As the front arrives the wind will switch to the North West then north before settling back to North East. We planned to use the period where there was no East in the wind to make our way east. The wind would be aft of the beam for all that time. The two problems are ...
1) fronts can be quite strong and pack winds of 30-40 or higher was they pass
prepare your boat for winds up to 50 knots, we used or triple-reefed main and reefed our small tough jib
2) a fast moving front might run past so quickly that we wouldn't get far enough east.
we averaged 170 miles per day and kept up with the front using it to make almost 500 miles easting
Summary:
Offshore route is a possible option if your boat and crew are prepared for a tough week at sea.
Be prepared for strong winds and tough uphill condiions.
Watch the weather in advance to see how the fronts are passing.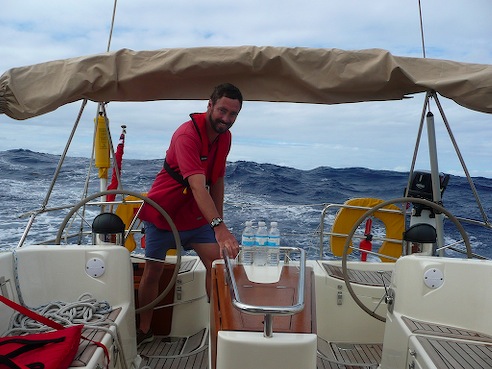
Plan your passages around the world with us aboard Distant Shores
Order the Super Pack on DVD and get Season 1-10 Downloadable.
Order the Super Pack on Vimeo and we will send you the code for Season 10 as a bonus.
There are two main strategies for a North American boat wanting to get to the Caribbean...
1) The Thorny Path - jumping from island to island through the Bahamas, Turks & Caicos, Dominican Republic and Puerto Rico. (yellow arrows)
2) Offshore - directly offshore from Beaufort or North of there to the BVI. (red arrow directly fro Beaufort North Carolina)
Our plan was to modify the second option and jump off from the Bahamas heading directly east to join the offshore route, then head SE to the Caribbean. This would be a passage of over 1000 miles and the prevaiing winds are from the east so this initial easterly push would be dead into 15-20 knots. My plan was to wait for a cold front, and use the wind shift to hitch a ride and hopefully gain some easting that way.
With option 1) The Thorny Path, one might spend 2 months getting south. Our option 2) would take 2 weeks (one waiting for a front then 7-8 days sailing direct tp the Caribbean.
Of course any boat planning this must be completely prepared for some tough going. The front means you might be out in 30-40 knots of wind as the front passes, and the rest will be close hauled in 15-20 or higher.
Distant Shores is a very good boat for this passage since she is quite good close hauled. We swung the keel all the way down to our full draft of 9-feet, and with our long waterline we go upwind very well.
It was also important to be able to go fast enough that we would be able to stay with the front. The idea that as the front approaches the winds will clock around from the proveailing Easterly, to South East, then south. Then they will build in strength and clock further to the South West. As the front arrives the wind will switch to the North West then north before settling back to North East. We planned to use the period where there was no East in the wind to make our way east. The wind would be aft of the beam for all that time. The two problems are ...
1) fronts can be quite strong and pack winds of 30-40 or higher was they pass
prepare your boat for winds up to 50 knots, we used or triple-reefed main and reefed our small tough jib
2) a fast moving front might run past so quickly that we wouldn't get far enough east.
we averaged 170 miles per day and kept up with the front using it to make almost 500 miles easting
Summary:
Offshore route is a possible option if your boat and crew are prepared for a tough week at sea.
Be prepared for strong winds and tough uphill condiions.
Watch the weather in advance to see how the fronts are passing.
Plan your passages around the world with us aboard Distant Shores
Order the Super Pack on DVD and get Season 1-10 Downloadable.
Order the Super Pack on Vimeo and we will send you the code for Season 10 as a bonus.